Airhood 2 Portable Ventilator

The world’s first portable kitchen air cleaner, reimagined.

00

brief

Display Airhood's ventilation and customization capabilites in a short animated sequence for use in longer live-action video.

execution

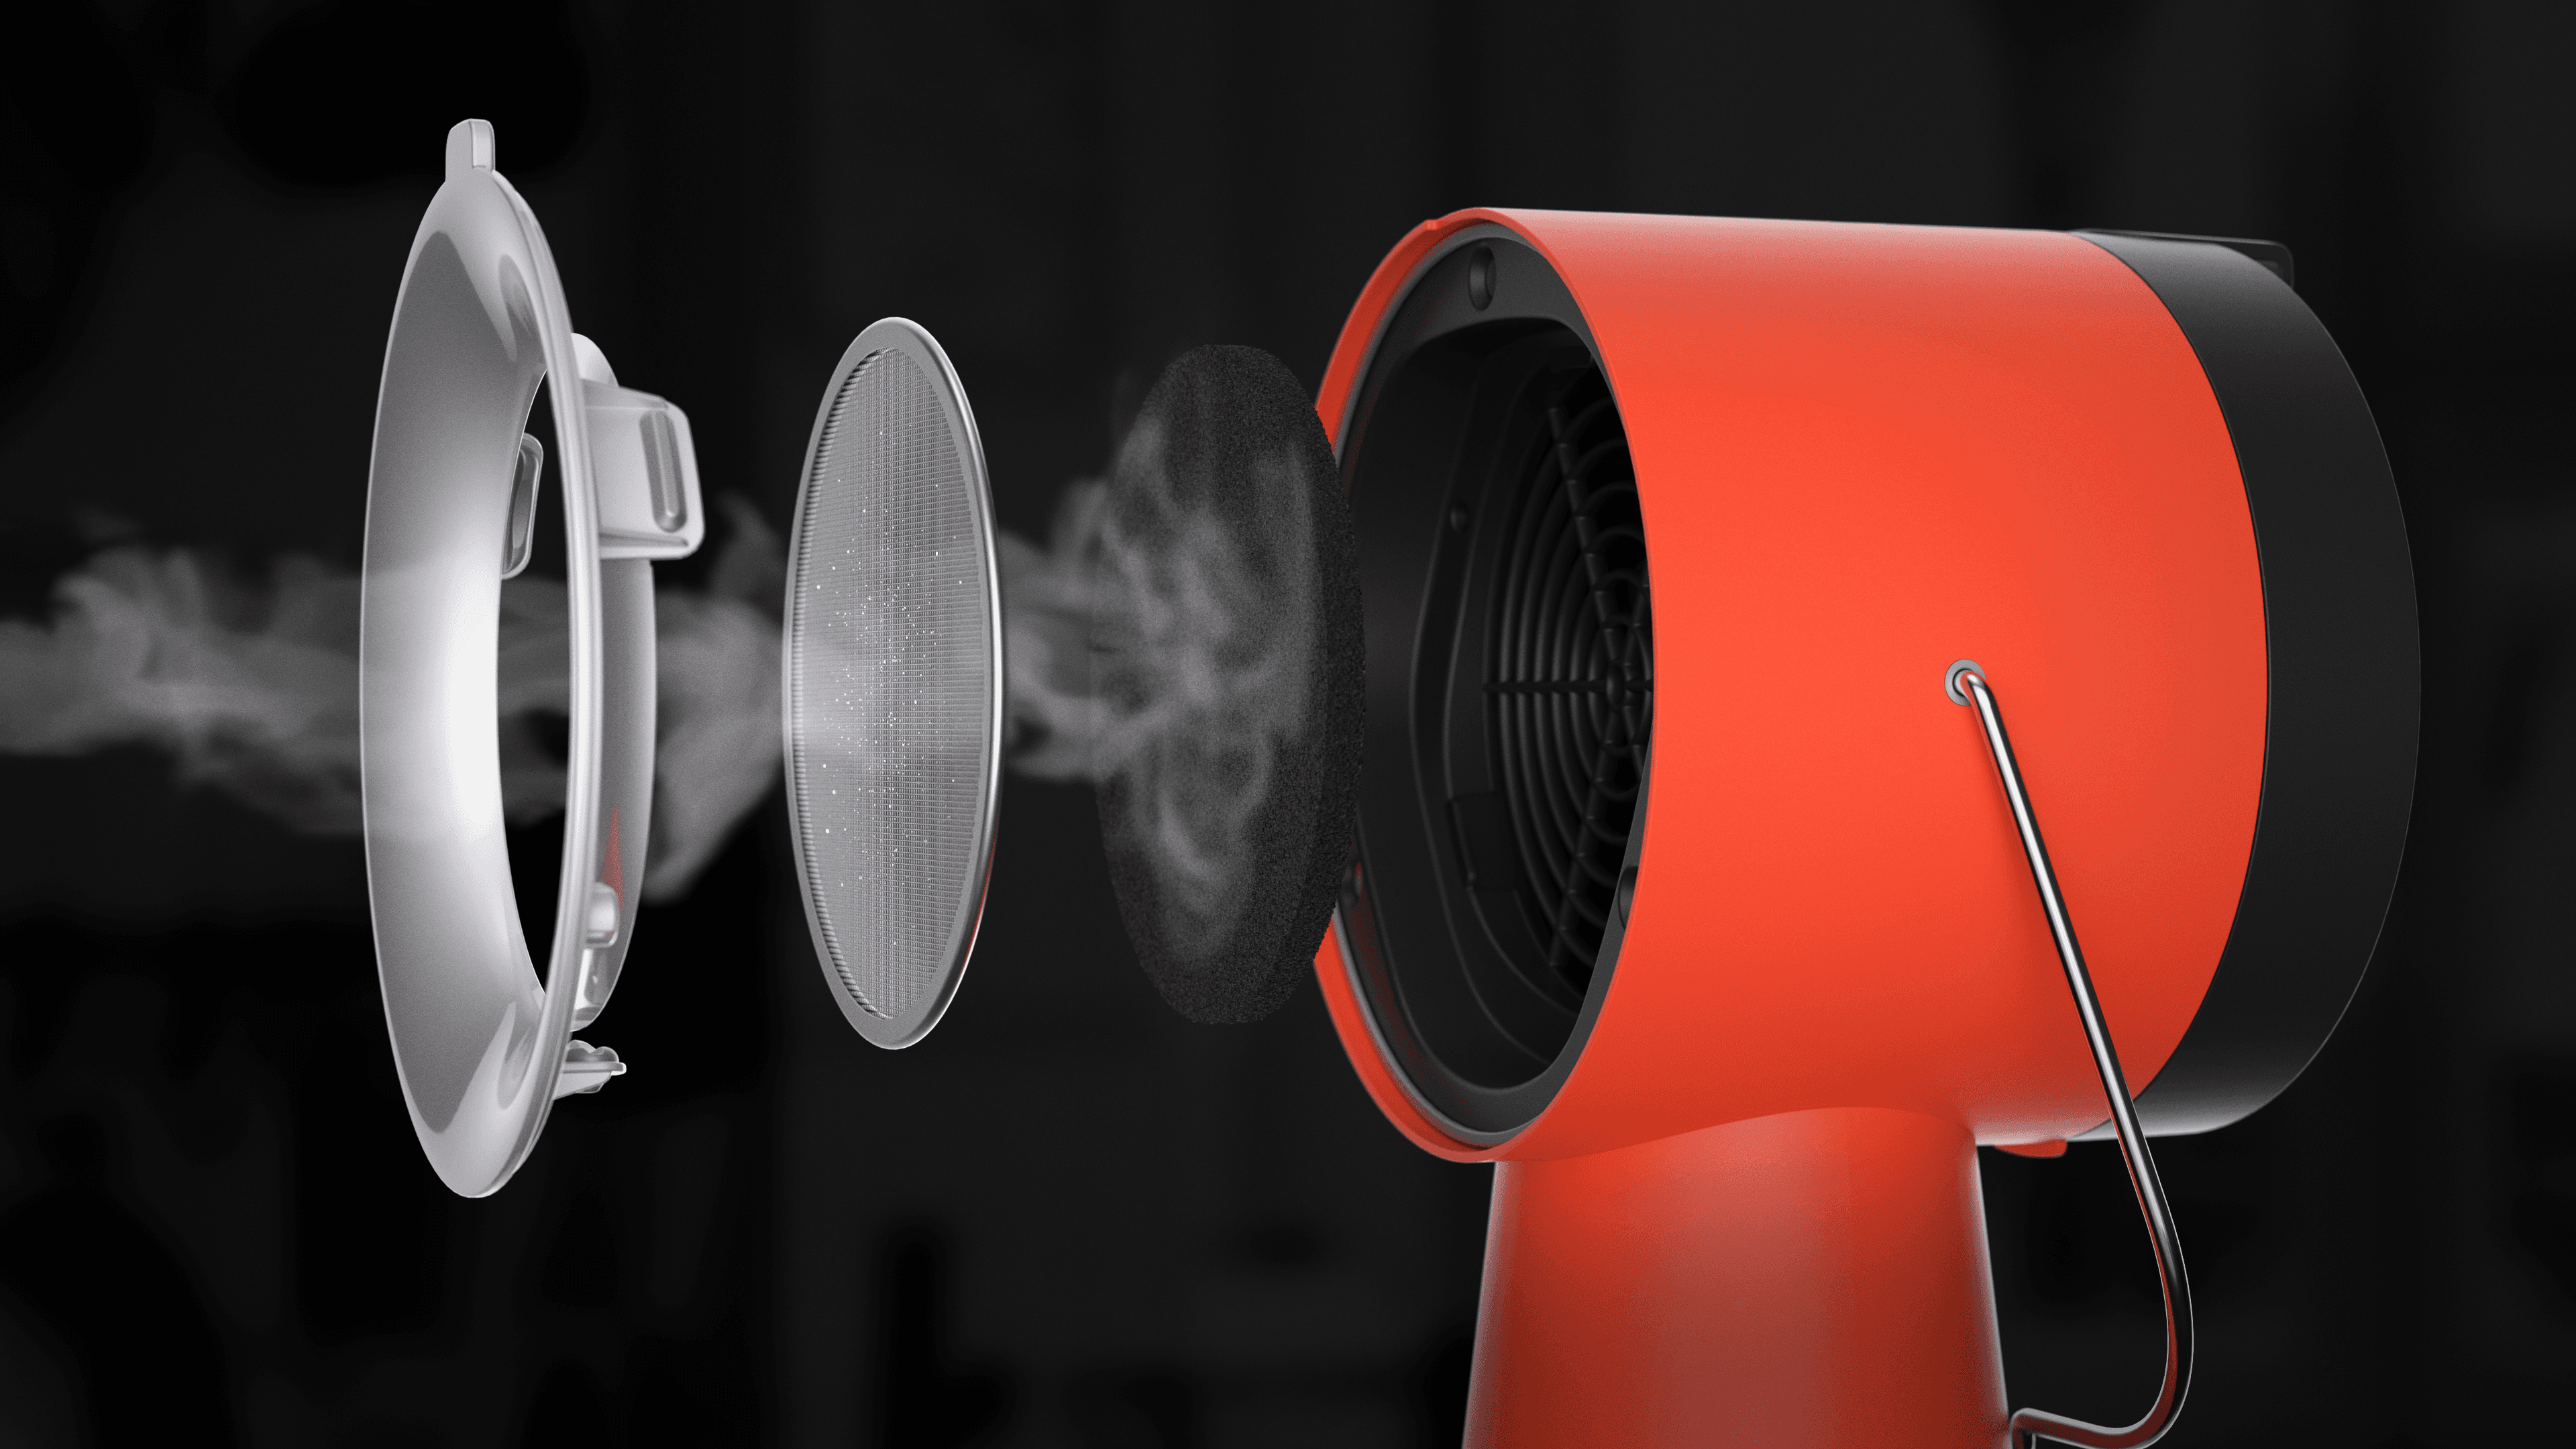
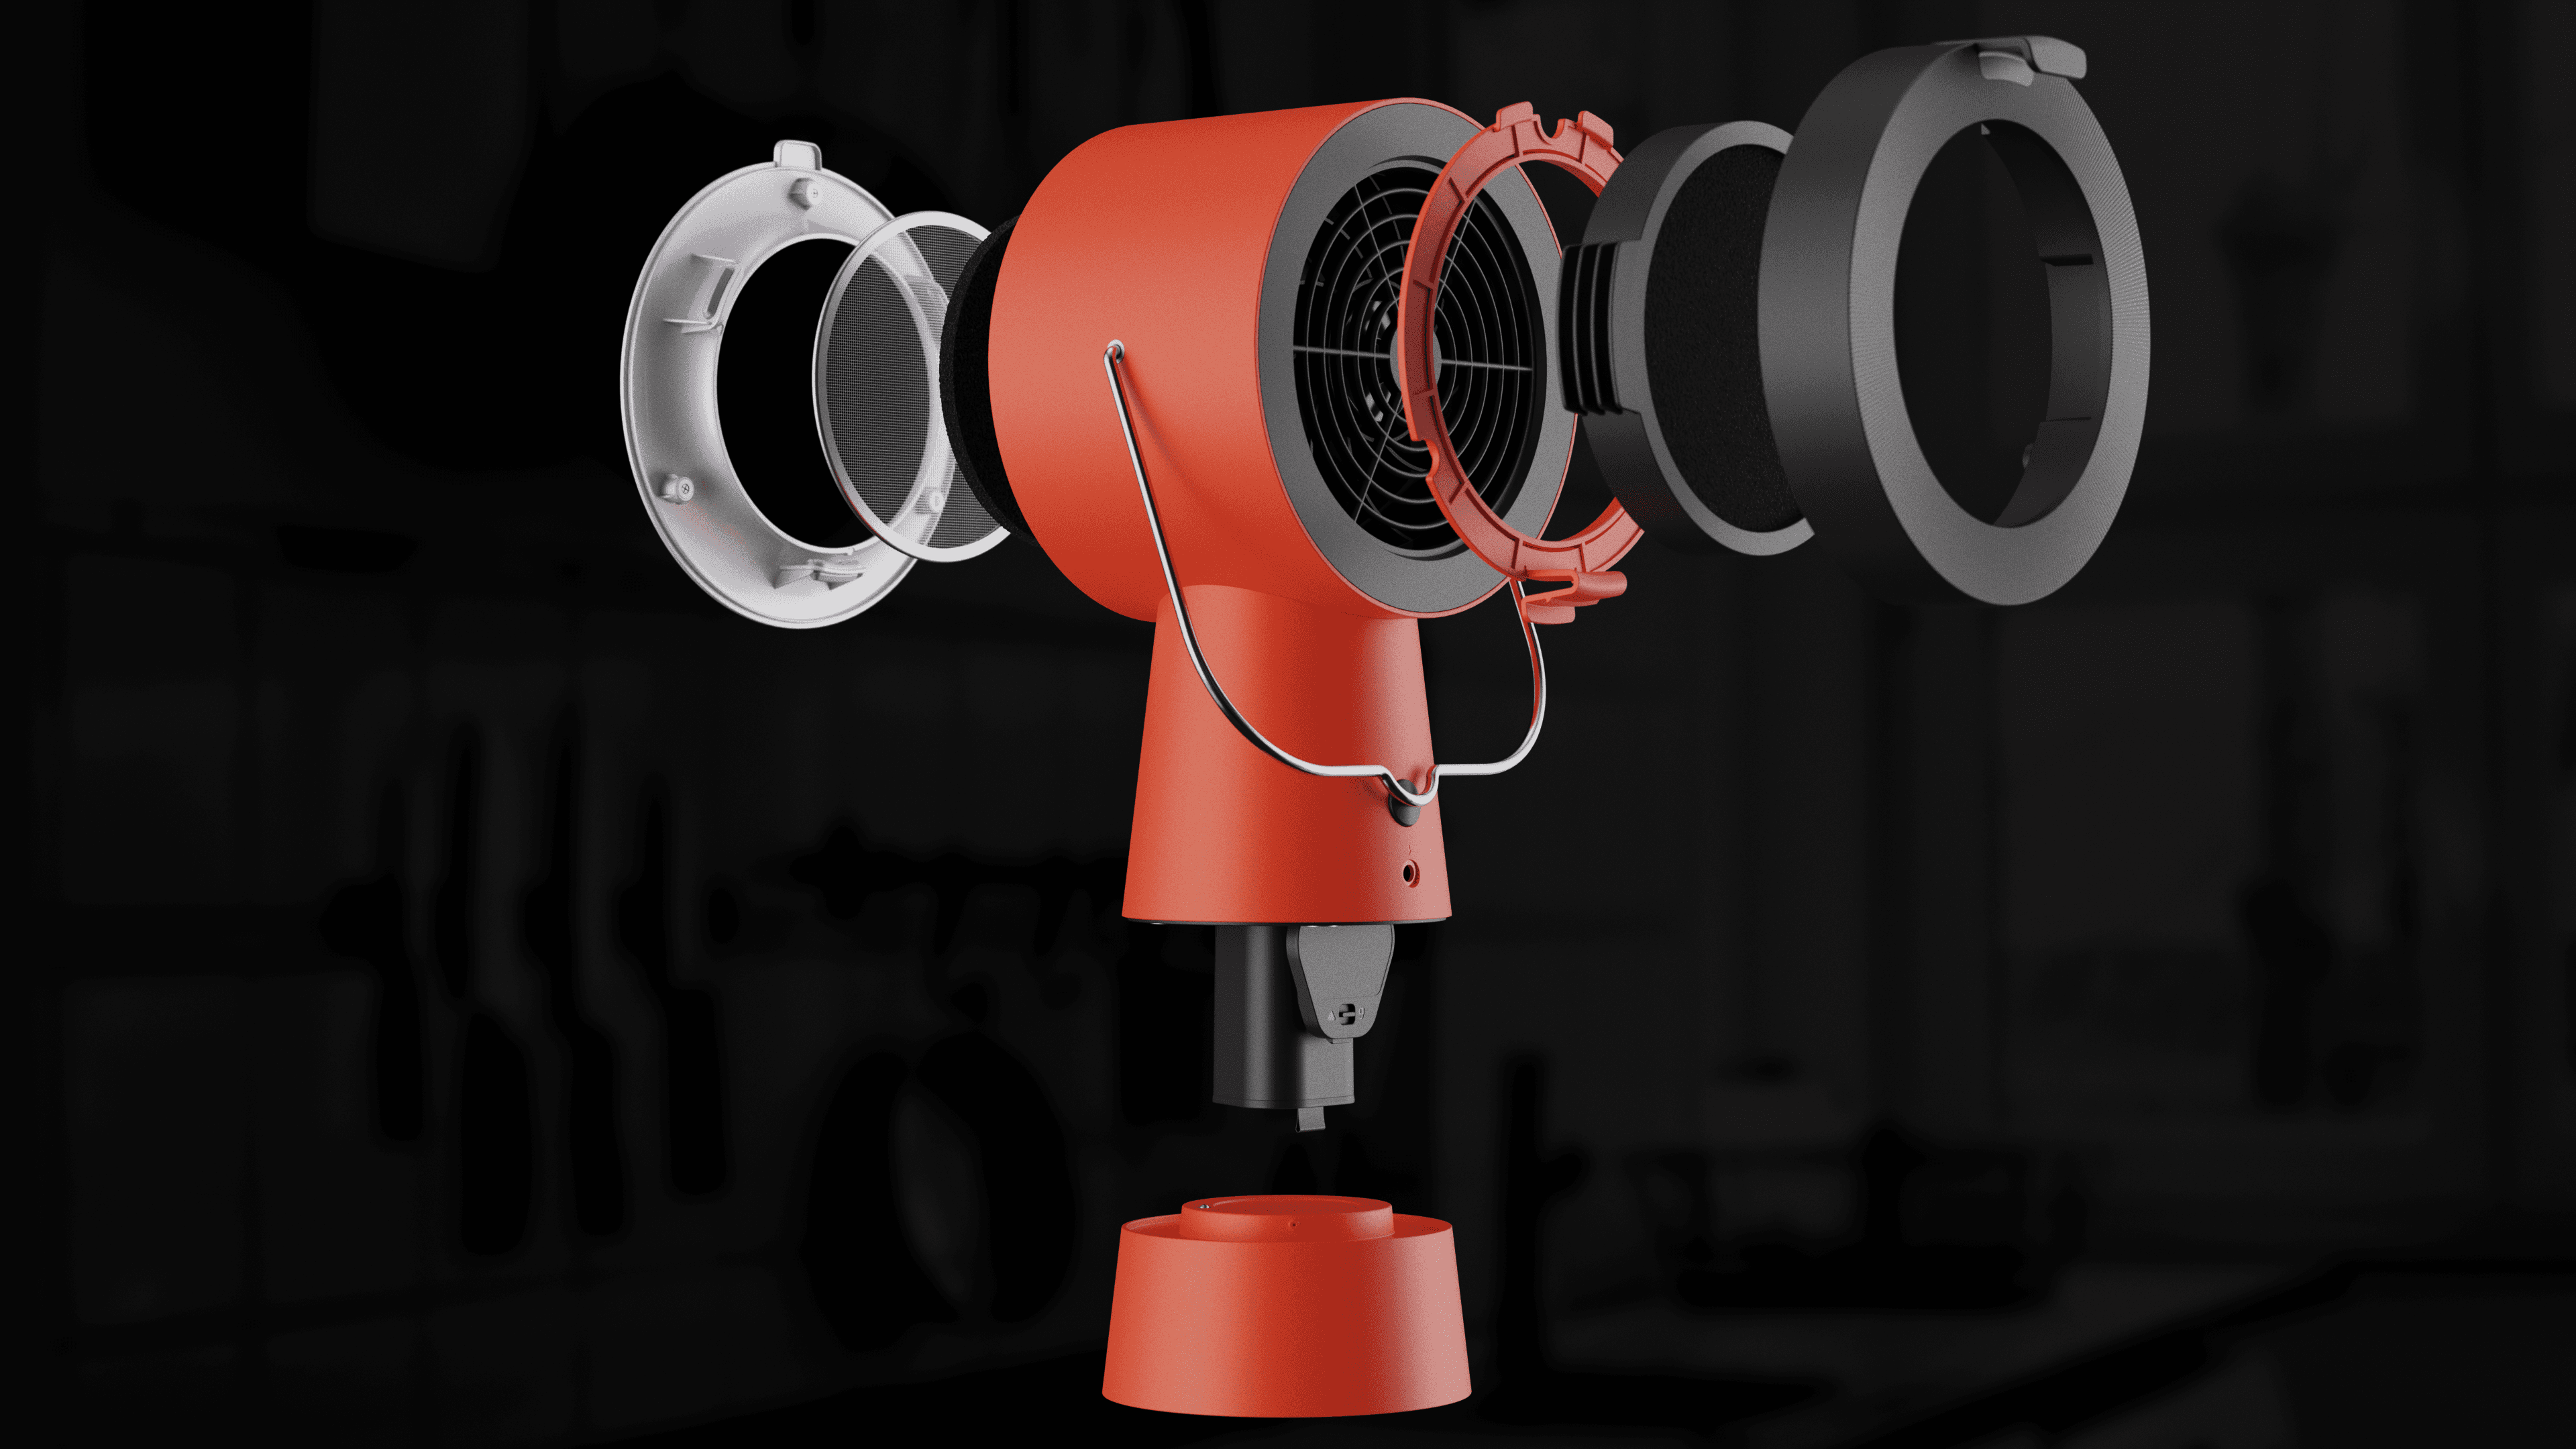
I created a dynamic animation and smoke simulation, using an exploded view to showcase the customizability as well as the internal charcoal filter effectively blocking the steam.

Airhood needed to showcase details and functionality in a clear way that wouldn't be possible with live action footage.

The brief I got for the animation was quite light on specifics, but had three criteria I absolutely had to meet: Show the charcoal filter blocking the steam Show an exploded shot with all the attachments Keep the timing as tight as possible I decided on a smooth, sweeping 360 camera movement, which could clearly show every element they asked for in as little time as possible. Focusing first on the big moments (like the exploded shot and the steam close up) and tweaking the timing until everything felt right. Once I blocked out the full animation, I set to work on the materials and lighting, making sure everything looked authentic, matched the live action footage, and was illuminated clearly without looking too flat. I also added a basic kitchen island scene in neutral colors to help ground the animation, showcase the environment it would be used in, and make the Airhood itself stand out against the dark colors. Finally, with everything in place, I started on the smoke simulation, which I knew would be the longest part of the process by far, simply by nature of being a simulation. I spent a long time dialing in the parameters of the smoke just right to get that buffering effect on the charcoal filter. I also added some moisture droplets collecting on the metal filter. Once it was perfect, I rendered everything in layers, so I could adjust the intensity of the smoke even further in After Effects, as well as do a little bit of light color correction.

The brief I got for the animation was quite light on specifics, but had three criteria I absolutely had to meet:

  1. Show the charcoal filter blocking the steam

  2. Show an exploded shot with all the attachments

  3. Keep the timing as tight as possible

I decided on a smooth, sweeping 360 camera movement, which could clearly show every element they asked for in as little time as possible. Focusing first on the big moments (like the exploded shot and the steam close up) and tweaking the timing until everything felt right.

Once I blocked out the full animation, I set to work on the materials and lighting, making sure everything looked authentic, matched the live action footage, and was illuminated clearly without looking too flat. I also added a basic kitchen island scene in neutral colors to help ground the animation, showcase the environment it would be used in, and make the Airhood itself stand out against the dark colors.

Finally, with everything in place, I started on the smoke simulation, which I knew would be the longest part of the process by far, simply by nature of being a simulation. I spent a long time dialing in the parameters of the smoke just right to get that buffering effect on the charcoal filter. I also added some moisture droplets collecting on the metal filter. Once it was perfect, I rendered everything in layers, so I could adjust the intensity of the smoke even further in After Effects, as well as do a little bit of light color correction.

year

2025

timeframe

14 days

tools

Blender, After Effects

category

Freelance Work

01

A close up of the top of the Airhood

01

Another angle on the steam buffeting against the charcoal filter

01

A still shot of the exploded view, showing every component

.say hello

I'm open for freelance projects, feel free to email me to see how can we collaborate

.say hello

I'm open for freelance projects, feel free to email me to see how can we collaborate